
Your definitive guide to the Nissan Electronic Parts Catalogue
Installing Nissan FAST
Please note: This guide is designed for people that have received a DVD with the 3 main EPCs on. This does not cover users who purchased a UK EPC on a CD from eBay although setup on those is actually quite straightforward!
Part 1 - Before you begin
I advise you install the Asian language pack if you have not already, this is not necessary however it makes the program look a bit prettier on the Japanese FAST (You see the Japanese text instead of garbled ASCII).Part 2 - Installing the basic software
- Put the DVD into your computer.
- Navigate to the folder "X:\Installer\WIN32\SINKI"
(Where X is the letter of your DVD drive):
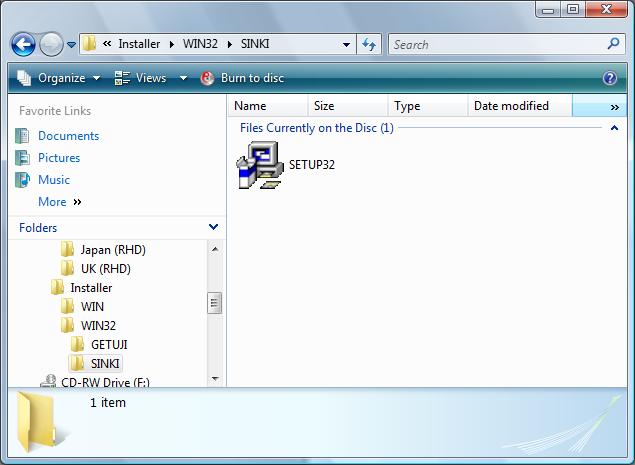
- Run the SETUP32.EXE file and choose where you want to install the program. In my case I just chose C:\NISSAN.
- Click next through all the screens until the software is installed.
- You should now have a "Windows-FAST SETUP MENU" on
the screen:
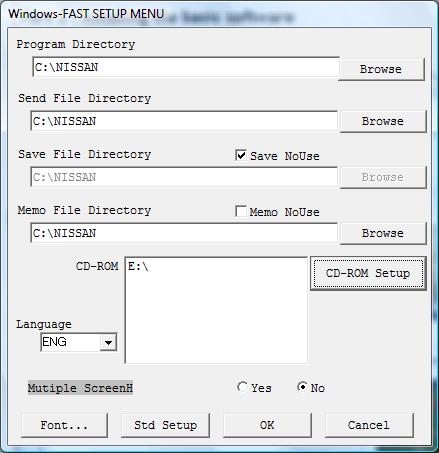
- Everything on that screen can be left in tact except for the "Font..." setting and the "CD-ROM Setup".
- If you have installed the Asian language pack, then click Font... and choose "MS Gothic" in the fonts list (this font contains all the Japanese characters). If you haven't, you can skip this step.
- CD-ROM Setup will be continued on Part 3... (Don't close that window!)
Part 3 - Setting up the EPC data directories
- For this step you have two options, you may copy all of the "FAST Data" folder on the DVD to somewhere on your hard drive so you do not need to leave the DVD in the drive to run FAST or you can setup FAST to run from the DVD. The procedure is the same for both, it's all down to how much hard drive space you have really!
- Click CD-ROM Setup, you will be presented with a
screen asking how many "drives" you want to use. Click the 7 Drives
option and you should see a screen like this:
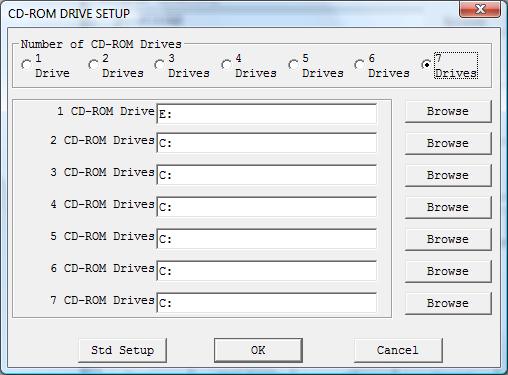
- Things get a little complicated here so I'll try and
make it as simple as possible. Each EPC does not use just 1 "drive".
For example, the Japanese one uses 5 of these drives!
For the purpose of this guide let's say we want to set up the Japanese and European LHD EPCs simultaneously - this involves using all 7 "drives".
For reference, these are the folders you will need to include for each EPC:
Japanese: A1, A2, A3, B1 and B2
European LHD: EL1, EL2
UK RHD: UK (RHD)
- Click Browse next to "CD-ROM Drive 1" and choose the
location of your "A1" folder (this could be on the DVD or a location of
your choice if you copied them to your hard drive. Repeat this for all
the A's and B's and the EL's and you should have something that looks
like this:
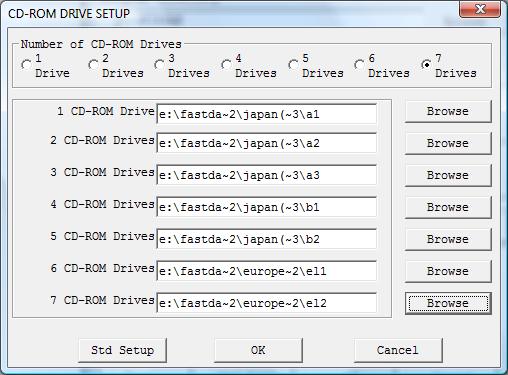
- Click OK on this screen and then click OK on the "Windows-FAST SETUP MENU".
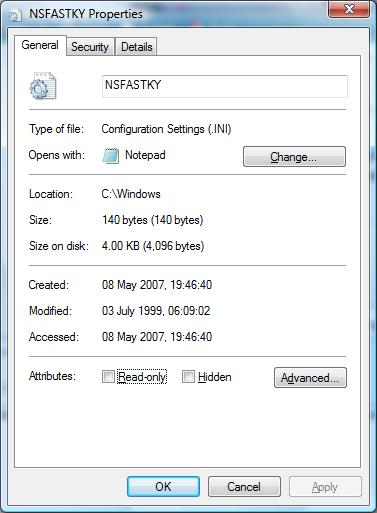
- Before you can continue, browse to the folder
X:\Installer\WIN\GR\ (Where X is your DVD drive), copy
NFASTSKY.INI to C:\Windows (or wherever your Windows install resides)
and mark it as NOT being read only, like this:
- That's it for that! Now the final part...
Part 4 - Running FAST (Choosing your desired EPC)
- Now you've completed the install, the FAST install
should have provided a "Nissan Menu" in a "FAST For Windows" folder in
your Start menu, run this and you should see something like this:
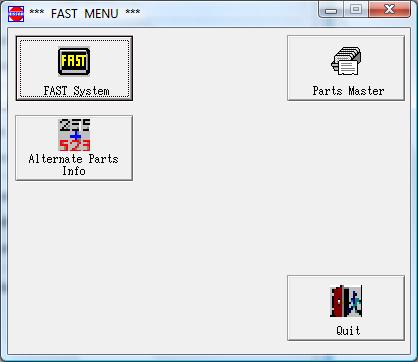
- Click FAST System. If you only specified one set of
EPC libraries, FAST will load up straight away, otherwise it will ask
you which to load (in this case Japanese (JP) or Euro LHD (EL)):
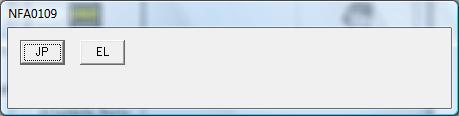
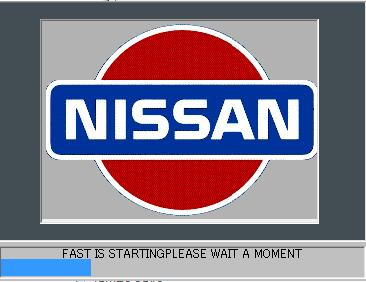
- Click the button you want and FAST will load up!
- And that's it! Now you can refer to the other guides on how to use FAST if you aren't sure.
Nissan is a registered trademark of Nissan Motor Co., Ltd